
How to use Redux in React TypeScript Application
Redux is a predictable state container for JavaScript apps. It helps you write applications that behave consistently, run in different environments (client, server, and native), and are easy to test. Redux can be used with any library.
It’s a popular library for managing state in React apps. It can offer better developer experience when using along with TypeScript, which is a superset of JavaScript that type-checks code to make it robust and understandable.
In this post, we will show you How To Use Redux with Hooks in a React-TypeScript Project by building an app that allows you to add, delete, and show books.
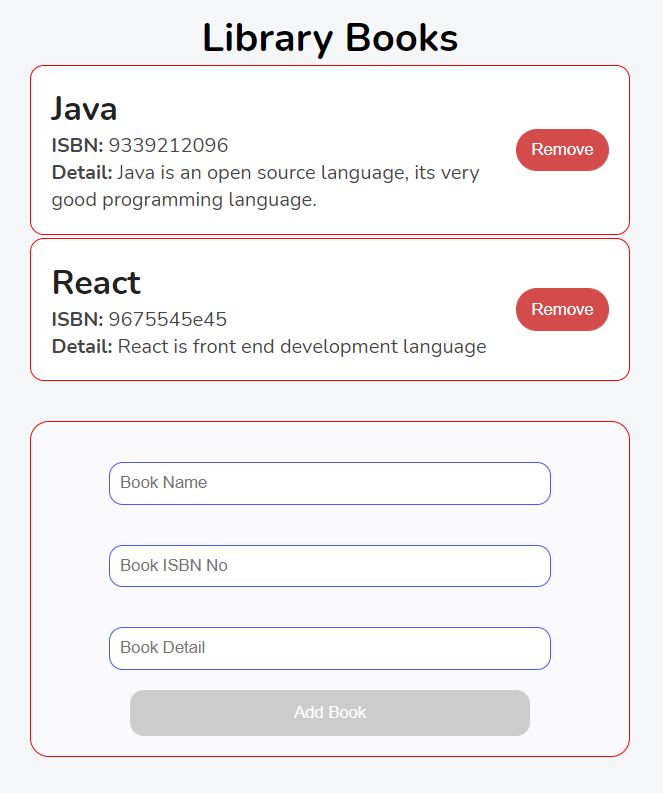
Preview of Running App Using React Redux with TypeScript
Prerequisites
We are asuming that you have basic knowledge of the React, Redux and TypeScript. If you are newbie then first read basic Javascript, React and Typescript.
Setting up the React Redux Typescript project
Lets create a new project of React App using the below command. For this you need to open your IDE console, I am using the Visual Studio Code terminal . you can open the CLI (command-line interface) and execute this command.
npx create-react-app my-app --template typescript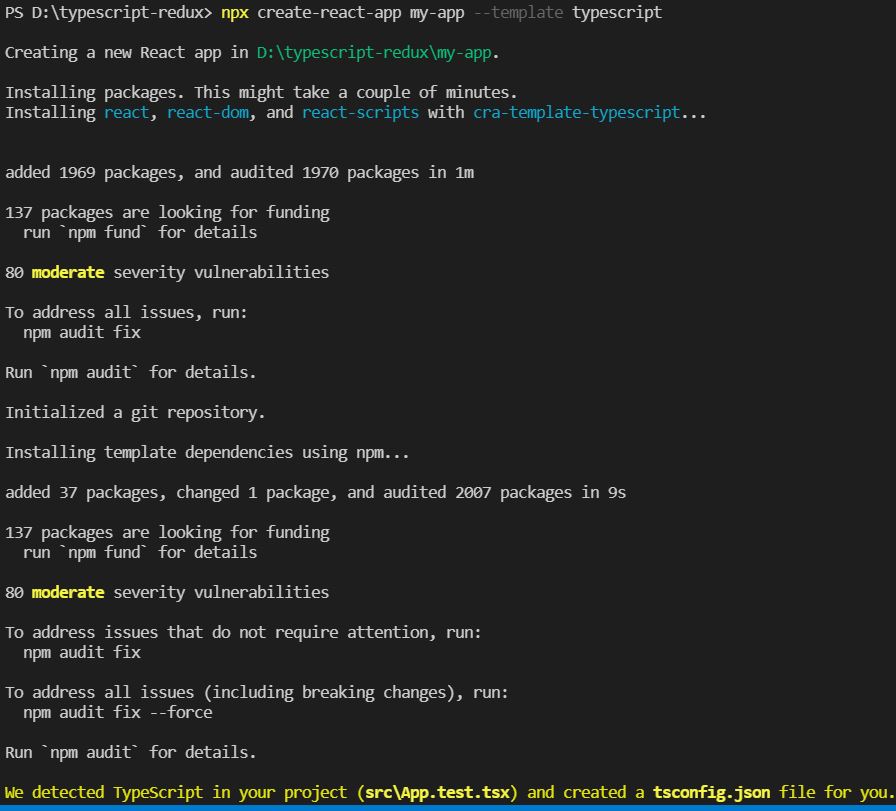
It will bootstrap and create the folder structure like above.
Lets create the structure of the project like below. Here we are adding components folder in which some tsx files AddBook.tsx & Book.tsx are created. These will serve as React component.
Store folder that will store all store or React Redux related files. I have created some file here like actionCreators.ts, actionTypes.ts and reducer.ts. We will discuss it in details later.
Lets install the Redux in the project. Its quite simple and create our first store.
Open the CLI / terminal and run the command
# if using yarn
yarn add redux react-redux react-thunk
or
# if using npm
npm install redux react-redux react-thunk
We also have to install their types as development dependencies to help TypeScript understanding the libraries.
Now install the development dependencies for typescript. react, react-redux and react-thunk. so that TypeScript can understand the command. React development company noida
#if using yarn
yarn add @types/react @types/react-redux @types/react-thunk
#if using npm
npm install @types/react @types/react-redux @types/react-thunkWe have installed all the requirement for the TypeScript, now we will create types for the project.
Create types
Open the file type.d.ts and lets create the types. TypeScript adds optional types to JavaScript.
Here, we start by declaring The interface IBook which reflects the shape of a given book. Then, we have BookState, BookAction, and DispatchType that will serve as types for respectively the state object, the action creators, and the dispatch function provided by Redux.
That said, we now have the required types to start using React Redux. Let’s create the action types.
Create action types
#store/actionTypes.ts

export const ADD_BOOK = "ADD_BOOK"
export const REMOVE_BOOK = "REMOVE_BOOK"
We require two action types for the Redux store. One for adding Book and another for remove Book.
Create action creators
#store/actionCreators.ts

import * as actionTypes from "./actionTypes"

export function addBook(book: IBook) {
  const action: BookAction = {
    type: actionTypes.ADD_BOOK,
    book,
  }
   return simulateHttpRequest(action)
}

export function removeBook(book: IBook) {
  const action: BookAction = {
    type: actionTypes.REMOVE_BOOK,
    book,
  }
  return simulateHttpRequest(action)
}

export function simulateHttpRequest(action: BookAction) {
  return (dispatch: DispatchType) => {
    setTimeout(() => {
      dispatch(action)
    }, 500)
  }
}
In this tutorial, I will simulate the HTTP request by delaying it for 0.5 seconds. But, feel free to use a real server if you want too.
Here, the function addBook will dispatch an action for adding a new book, and the method removeBook will do the opposite and hence, delete the object passed in as an argument.
Create a reducer
A reducer is a pure function that receives the state of the store and an action as parameters and then returns the updated state.
Below we have added a initial store that is actually required in the reducer.
#store/reducer.ts

const initialState: BookState = {
  books: [
    {
      id: 1,
      isbn: "9339212096",
      title: "Java",
      body: "Java is an open source language, its very strong programming language.",
    },
    {
      id: 2,
      isbn: "9675545e45",
      title: "React",
      body: "React is front end development language",
    },
  ],
}
As you can see here, we declare an initial state to have some books to show when the page loads. The state object needs to match the type BookState, otherwise, TypeScript will throw an error.
Complete reducer file looks like below.
#store/reducer.ts

import  * as actionTypes from "./actionTypes"

const initialState: BookState = {
  books: [
    {
      id: 1,
      isbn: "9339212096",
      title: "Java",
      body: "Java is an open source language, its very good programming language.",
    },
    {
      id: 2,
      isbn: "9675545e45",
      title: "React",
      body: "React is front end development language",
    },
  ],
}

const reducer = (
    state: BookState = initialState,
    action: BookAction
  ): BookState => {
    switch (action.type) {
      case actionTypes.ADD_BOOK:
        const newBook: IBook = {
          id: Math.random(),
          isbn: "98887" + Math.random(), //random isbn number just for example
          title: action.book.title,
          body: action.book.body
        };
        return {
          ...state,
          books: state.books.concat(newBook)
        };
      case actionTypes.REMOVE_BOOK:
        const updatedBooks: IBook[] = state.books.filter(
          (book) => book.id !== action.book.id
        );
        return {
          ...state,
          books: updatedBooks
        };
    }
    return state;
  };

  export default reducer;
Next, we have the reducer function that will take the previous state and an action to be able to update the store. Here, we have two actions: one for adding and another for deleting book.
With that in place, we can now handle the state with the reducer. Let’s now create a store for the project.
Create store
A Redux store is an object which store whole project data. There are 3 concept behind Redux store.
- Single source of truth
- State is mutable
- State can be change only through reducer.
#index.tsx

import * as React from "react";
import { render } from "react-dom";
import { createStore, applyMiddleware, Store } from "redux";
import { Provider } from "react-redux";
import thunk from "redux-thunk";

import App from "./App";
import reducer from "./store/reducer";

const store: Store<BookState, BookAction> & {
  dispatch: DispatchType;
} = createStore(reducer, applyMiddleware(thunk));

render(
  <Provider store={store}>
    <App />
  </Provider>,
  document.getElementById("root"));
Here we import the reducer function defined in the store folder, and then passed it as an argument to the method createStore in order to create a new Redux store. The redux-thunk middleware needs to be proceeded as a second parameter as well to the method to be able to handle asynchronous code.
Next, we connect React to Redux by providing the store object as props to the Provider component.
We can now use Redux in this project and access the store. So, let’s create the components to get and manipulate the data.
Create components
#components/AddBook.tsx

import * as React from "react";

type Props = {
  saveBook: (book: IBook | any) => void;
};

export const AddBook: React.FC<Props> = ({ saveBook }) => {
  const [book, setBook] = React.useState<IBook | {}>();

  const handleBookData = (e: React.FormEvent<HTMLInputElement>) => {
    setBook({
      ...book,
      [e.currentTarget.id]: e.currentTarget.value
    });
  };

  const addNewBook = (e: React.FormEvent) => {
    e.preventDefault();
    saveBook(book);
  };

  return (
    <form onSubmit={addNewBook} className="Add-book">
      <input
        type="text"
        id="title"
        placeholder="Book Name"
        onChange={handleBookData}
      />
       <input
        type="text"
        id="isbn"
        placeholder="Book ISBN No"
        onChange={handleBookData}
      />
      <input
        type="text"
        id="body"
        placeholder="Book Detail"
        onChange={handleBookData}
      />
      <button disabled={book === undefined ? true : false}>
        Add Book
      </button>
    </form>
  );
};
To add a new book, we will be using this form component. It receives the function saveBook as a parameter, which allows adding a new book to the store. The book object should follow the type IBook to make TypeScript work.
#components/Book.tsx

import * as React from "react";
import { Dispatch } from "redux";
import { useDispatch } from "react-redux";

type Props = {
  book: IBook;
  removeBook: (book: IBook) => void;
};

export const Book: React.FC<Props> = ({ book, removeBook }) => {
  const dispatch: Dispatch<any> = useDispatch();

  const deleteBook = React.useCallback(
    (book: IBook) => dispatch(removeBook(book)),
    [dispatch, removeBook]
  );

  return (
    <div className="Book">
      <div>
        <h1>{book.title}</h1>
        <p><strong>ISBN:</strong> {book.isbn}</p>
        <p><strong>Detail:</strong> {book.body}</p>
      </div>
      <button onClick={() => deleteBook(book)}>Remove</button>
    </div>
  );
};
The Book component shows an book object. The function removeBook has to dispatch to access the store and hence delete a given book. That’s the reason why we use here the useDispatch hook providing by Redux to complete the removing action.
Next, The use of useCallback helps to avoid unnecessary re-rendering by memoizing values as dependencies.
We have finally the components needed to add and show the books.
#App.tsx

import * as React from "react";
import { useSelector, shallowEqual, useDispatch } from "react-redux";
import "./index.css";
import { Book } from "./components/Book";
import { AddBook } from "./components/AddBook";
import { addBook, removeBook } from "./store/actionCreators";
import { Dispatch } from "redux";

const App: React.FC = () => {
  const books: readonly IBook[] = useSelector(
    (state: BookState) => state.books,
    shallowEqual
  );

  const dispatch: Dispatch<any> = useDispatch();

  const saveBook = React.useCallback(
    (book: IBook) => dispatch(addBook(book)),
    [dispatch]
  );

  return (
    <main>
      <h1>Library Books</h1>
      {books.map((book: IBook) => (
        <Book
          key={book.id}
          book={book}
          removeBook={removeBook}
        />
      ))}
      <AddBook saveBook={saveBook} />
    </main>
  );
};
export default App;
The useSelector hook enables access to the state of the store. Here, we pass shallowEqual as a second argument to the method to tell to Redux to use shallow equality when checking for changes.
Next, we rely on useDispatch to dispatch an action for adding books in the store. Finally, we loop through the array of books and pass each to the Book component to show it.
With that, we can now browse to the root of the project and then execute this command.
#yarn
yarn start
#npm
npm startNow open http://localhost:3000/ in the browser, you should see this.
Now Try to add some Book & Remove Book.
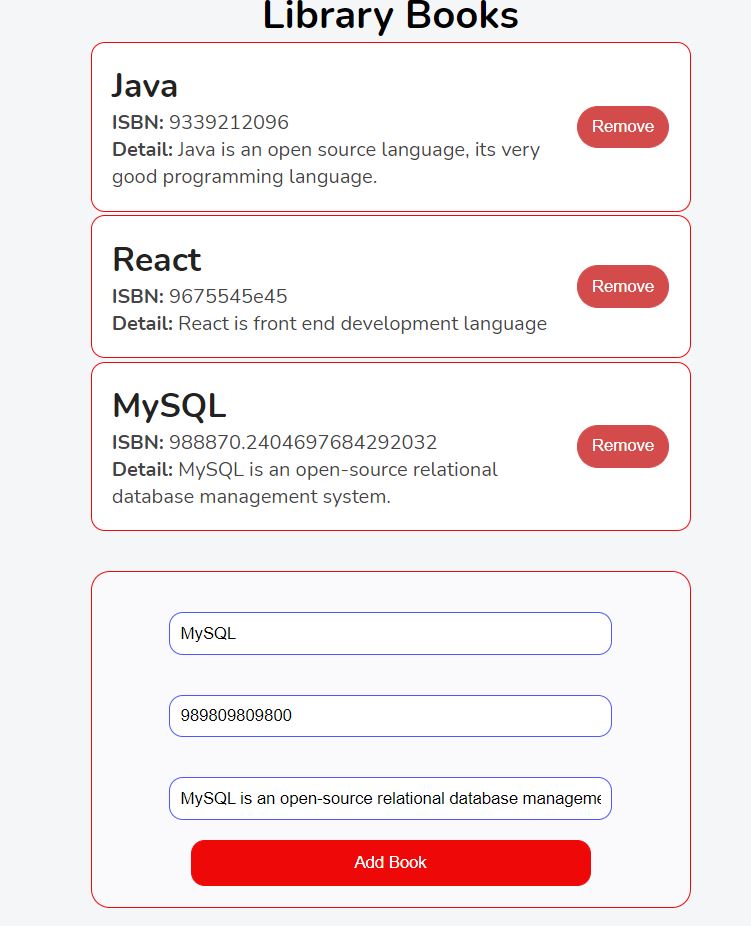
For me everything is working perfectly. Thanks God 🙂
Thanks for reading the post How To Use Redux in your React TypeScript Application
You can find the github code here


![Top 49 React interview questions and answers [2025]](https://seoinfotech.com/wp-content/uploads/2020/12/React.JS-Interview-Questions-Answers-300x175.png)